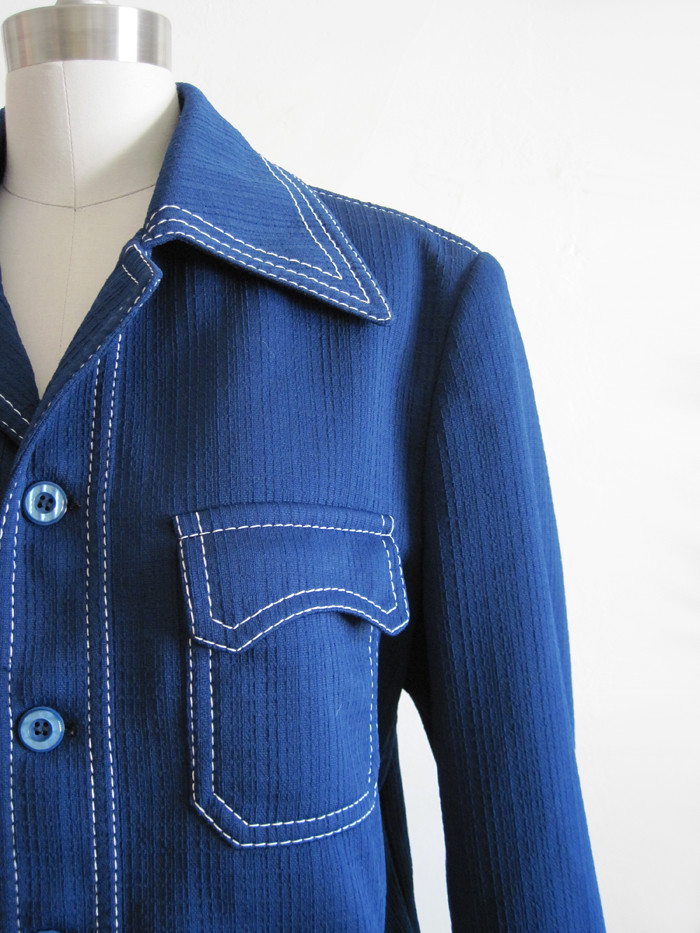
In this, the inaugural tutorial of our new Blog Design For All! series, we show you a quick and dirty method for making your images clickable (like the one above) to an outbound link. We'll also demonstrate how to tag your clickable image with simple HTML markup language so that the user sees a small bit of text near the cursor when she mouses over it. Although we'll be illustrating these techniques within the context of the Blogger platform, it should be noted that they may be incorporated into any website and/or free blogging site like Wordpress. Now, on with the show!
Step 1: Upload your image (already sized to fit the allotted space on your blog, preferably) to a free photo hosting site like Flickr.
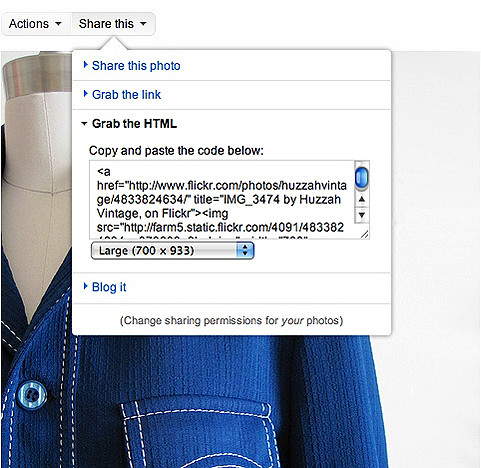
Step 2: In your Flickr photostream, find and select your recently-uploaded photo by clicking on it. Next, click on the 'Share this' drop-down menu and select the 'Grab HTML' option. In the new drop-down menu that appears underneath the HTML code, select the desired image size (i.e., the size you originally uploaded) and copy all of the HTML code that appears in the window above the size menu drop-down.

Step 3: In your Blogger publishing window, select the 'Edit Html' tab and paste the HTML you just copied on Flickr into the window. Click on the 'Compose' tab to check that the photo appears in the proper place among the other elements on the page.

Step 4: Back in the Blogger 'Edit Html' window, find the code you just inserted and replace the Flickr url after a href= with the url of the webpage that you'd like your image to point to. In the highlighted example above, http://www.flickr.com/photos... has been replaced with http://huzzahvintage.com/product... so that users are now taken to the product page for the pictured jacket instead of the Flickr page on which the image is hosted. Voila! You're done.
Extra Credit: Change the text inside the quotation marks after title= to whatever you like (a description of the image, special promo code details, etc.). Now, when the user mouses-over the image, she will see your special message and not the Flickr-generated title.
Extra Extra Credit: If you don't want users to leave your blog entirely, and would prefer, instead, that a new browser window open up upon click, simply add the tag target="_blank" after the title tag.
The end result:
* Next week we'll show you how to make a more stylized series of clickable images, like those featured in this post.


8 comments:
Wonderful tips! I'll have play around with the title thing and see if there's an easy way to do this with Blogger (I upload my photos directly to Blogger).
Lady, this is awesome. Thanks so much for posting this, and for writing it in a way that my easily-befuddled brain can grasp. Seriously though, most tutorials I've found can be very technical and dry, and sometimes all I want is a nice step-by-step in simple lay language. This delivers. I'm looking forward to the rest of the series!
Thanks for this...I need to step up my game and these tips will help!
woohoo! this is exactly what i was looking for! i'm going to give it a shot so if your google analytics reports that someone was on your blog for 4.5 hours, it's just me being mentally deficient...
@karen: You can still make the photo clickable by changing the link after the <h ref= tag in the same manner we did with the Flickr-generated code in your Blogger HTML tab. Instead of pointing to a blogger url, it can point to your shop, e.g. (I like to host my photos on Flickr because I have more control over their size; perhaps Blogger has changed its scripting since I last tried to use its photo upload option, but I seem to recall my photos always uploading in weird sizes....)
I'm excited for this new feature on your blog. Lately I've gotten pretty lazy with my web "skillz," but your new shop has inspired me to start to get back into it.
(seriously, your new shop design is awesome!)
gimme a 'HELL YEAH!' - okay, sorry i yelled - the ol' cheerleader stepped in
thanks, Amanda!
Post a Comment